
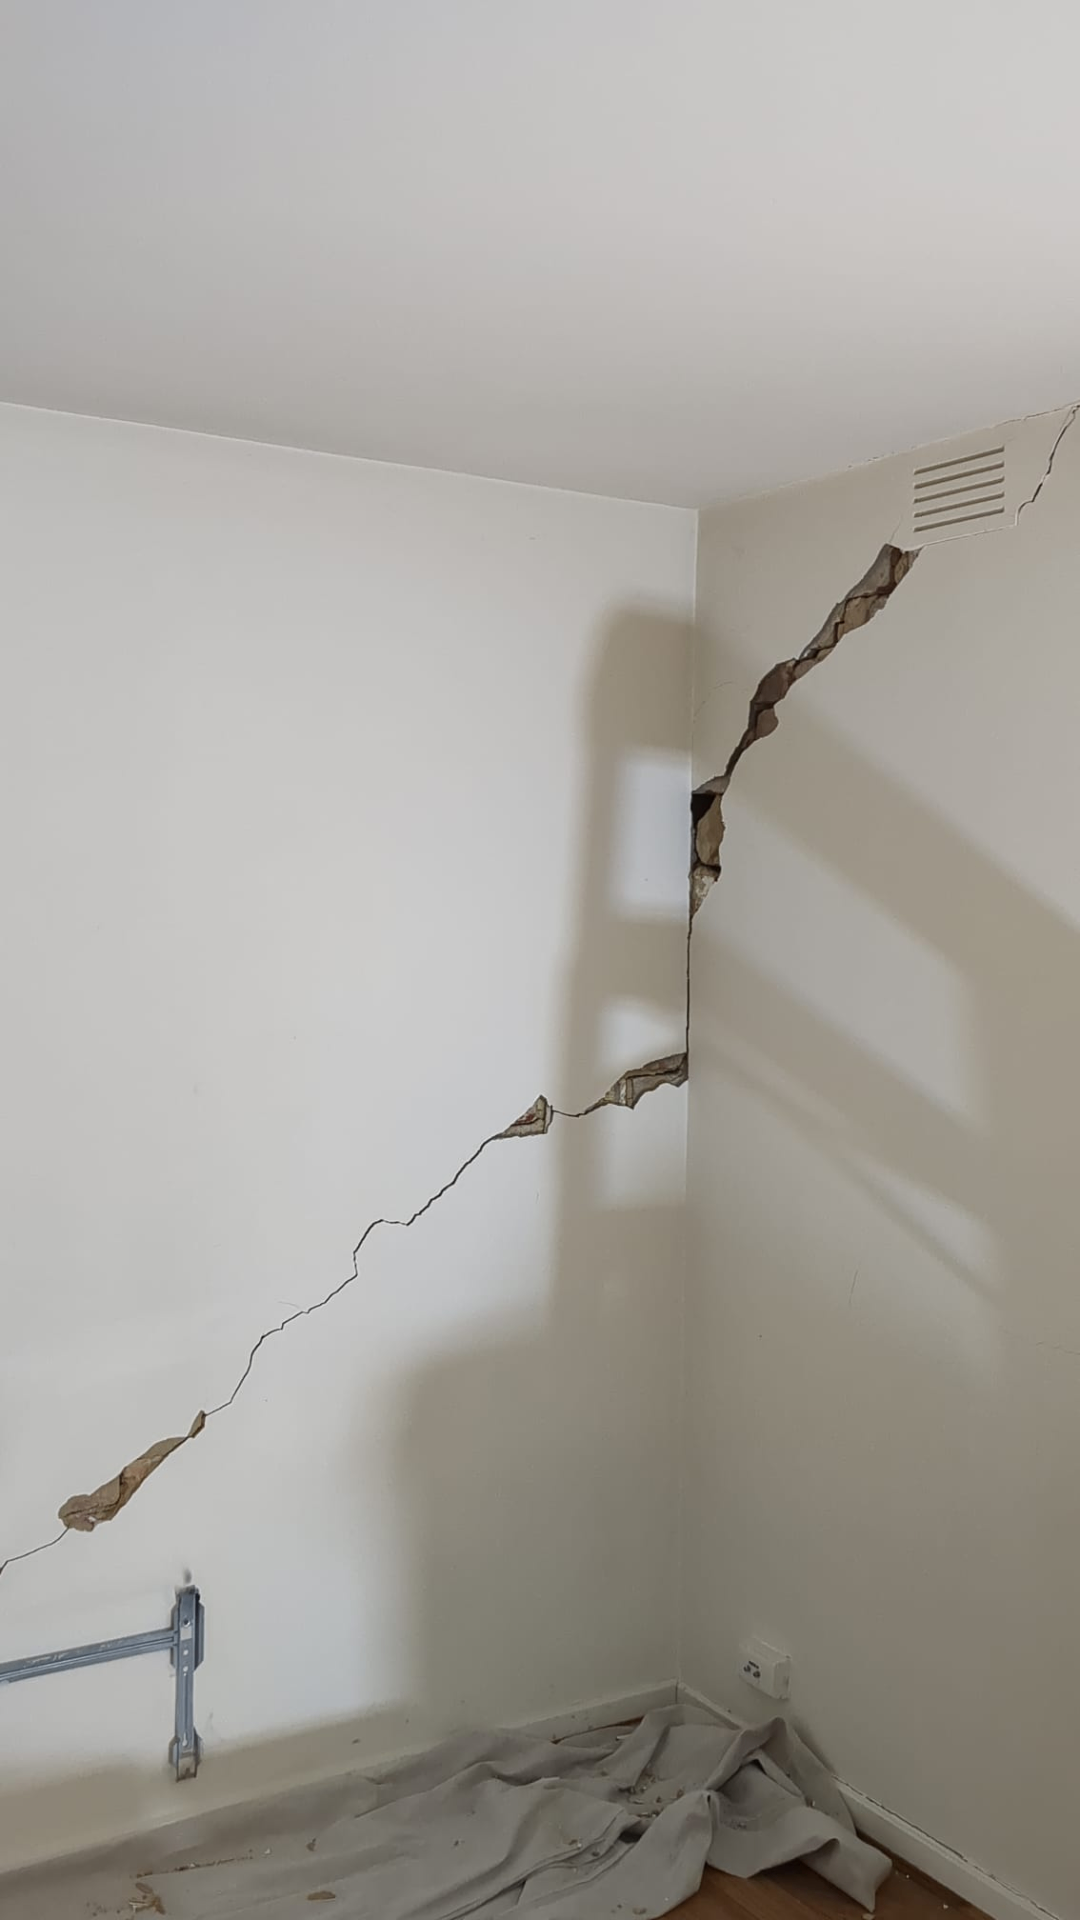
Living in Melbourne means dealing with our unique climate – hot summers, cold winters, and reactive clay soils that shift with moisture levels. All of this puts stress on your walls and ceilings. But before you grab the filler from Bunnings, it's crucial to know which cracks are cosmetic (DIY-friendly) and which signal deeper problems that need a professional.
Hairline Cracks (<1mm)
✓ DIY PossibleFine surface cracks often caused by paint buildup or minor settling. Common in older Melbourne homes.
DIY Steps
- Clean the crack with a damp cloth
- Apply flexible filler with a putty knife
- Sand smooth when dry
- Prime and paint to match
Call a Pro When
Cracks reappear within 6 months or spread
Settlement Cracks (1-3mm)
✗ Call a ProfessionalDiagonal cracks near doors/windows or corners. Often indicate foundation movement common in Melbourne's reactive clay soils.
Warning Signs
- •Cracks follow stair-step pattern in brickwork
- •Doors/windows sticking or not closing properly
- •Cracks widening over time
Call a Pro When
Always – needs structural assessment before repair
Ceiling Cracks
✓ DIY PossibleSmall cracks along ceiling edges or light fixtures. Often caused by thermal expansion.
DIY Steps
- Use flexible gap filler, not rigid compounds
- Apply in thin layers, building up if needed
- Allow 24hrs drying between coats
Call a Pro When
Cracks accompanied by sagging, bulging, or water stains
Structural Cracks (>3mm)
✗ Call a ProfessionalWide cracks that go through the wall, often with visible brick or framing behind. Like the crack shown in our featured image – this is a serious structural issue.
Warning Signs
- •Crack runs floor to ceiling
- •Visible gap you can insert a coin into
- •Chunks of plaster falling away
- •Crack appears suddenly after event (e.g., nearby construction)
Call a Pro When
Immediately – structural integrity may be compromised
Corner Cracks
✓ DIY PossibleCracks where walls meet ceilings or other walls. Usually caused by building movement.
DIY Steps
- Cut out loose material with a utility knife
- Apply mesh tape for reinforcement
- Cover with flexible joint compound
- Feather edges and sand smooth
Call a Pro When
Gap exceeds 5mm or crack returns repeatedly
Essential DIY Crack Repair Kit
- Flexible gap filler (not rigid plaster)
- Fibreglass mesh tape
- Flexible putty knife set
- Fine-grit sandpaper (120-180)
- Quality primer
- Drop sheets and masking tape
If the crack needs more than a DIY fill, see our plastering and plaster repair service in Melbourne.
Not Sure If It's DIY-Safe?
When in doubt, get a professional opinion. We offer free assessments across Melbourne – we'll tell you honestly if it's something you can tackle yourself or if it needs expert attention.
20+ years experience • Family-owned • Serving all of Melbourne
Disclaimer: This guide is for general information only. Always prioritise safety – if you're unsure about a crack's severity, consult a professional before attempting repairs.